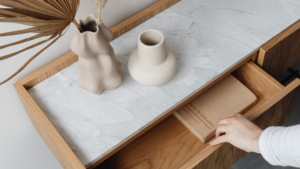
The space under your sink looks like a disaster zone. Cleaning bottles are shoved wherever they fit, sponges are multiplying in corners, the trash bags are crammed behind pipes, and there’s definitely something leaking that you’ve been avoiding. Every time you reach under there, you bang your hand on a pipe or knock something over.
Here’s the frustrating part: you’ve tried organizing this before. You bought some bins, maybe watched a YouTube video, spent an afternoon reorganizing everything neatly, and within two weeks it was chaos again. Your family couldn’t remember where anything belonged, bottles got shoved back in random spots, and you were back to the same mess.
The problem wasn’t effort. The problem was buying generic organizers without actually measuring your space or understanding what you’re storing. You forced solutions that didn’t fit your cabinet layout, your pipes, or your actual daily habits. Generic advice doesn’t work when your pipes are configured weirdly, your cabinet is shallow, or you have a family of five who all need access to different things.
This guide is different. Instead of selling you a bunch of products and hoping something works, we’re going to diagnose your specific situation first, then build a system that actually stays organized because it matches how you actually live.
Before You Buy Anything: The Under Sink Audit
Stop. Before you buy a single organizer, you need to understand what you’re actually working with. This step saves you money and prevents the failed attempts that led you here.
First, empty everything out from under your sink. Yes, everything. Put it all on your counter or bathroom floor. This is uncomfortable because you’ll probably find duplicate bottles you forgot you owned, dried-up products, and things that expired two years ago. That’s exactly the point. You can’t organize what you don’t see.
Now measure your space carefully. Measure the width, depth, and height of the cabinet. More importantly, measure around your pipes. Note where the pipes are positioned—are they on one side, down the middle, or awkwardly configured? Measure the clearance on either side of them. This is the information that determines what will actually fit. Most people skip this step and end up with organizers that look great in photos but don’t work because the pipes are in the way.
Look at your cabinet doors. Are they solid or hollow-core? This matters because hollow-core doors can’t support heavy organizers attached to them. Check if your cabinet has a garbage disposal or if it’s just a standard sink cabinet. Check if the pipes are exposed or hidden. All of these details change what solution will work.
Sort everything you pulled out into categories: cleaning supplies, sponges and scrubbers, trash bags, first aid items, hair products, or whatever categories match your household. This sorting step is where you realize you don’t need three spray bottles of the same cleaner or that you can consolidate items.
The golden rule: organize for what you actually use, not for what you think should go under a sink. If hair tools live there because it’s convenient for your routine, that’s where they belong. If you store kids’ pajamas under the sink because it’s near the bathroom, that’s your system. Stop fighting your actual habits and build around them instead.
The Three Under Sink Types: Which Is Yours?
Type 1: Standard Cabinet with Center Pipes — Your pipes run down the middle, leaving usable space on both sides but nothing in the center. This is actually ideal for pull-out organizers because you can use the sides efficiently. Skip: wall-mounted organizers or over-the-door solutions; you don’t need them when you have side space.
Type 2: Shallow or Awkwardly Configured — Your cabinet is either very shallow, has a garbage disposal taking up half the space, or has pipes configured in a way that makes standard organizers impossible. You need stackable, modular solutions that work around obstacles. Skip: deep pull-out drawers; they’ll stick out and hit your knees.
Type 3: Deep Cabinet with Rear Access Problem — You have plenty of space, but things get lost in the back because you can’t reach them without leaning way in. You need pull-out solutions or tiered shelving that brings everything forward. Skip: static bins; items will disappear in the back and you’ll be back to buying duplicates.
Start Here: The Three Essentials
Pull-Out Sliding Organizers
Why this matters: The reason things get lost under your sink is that you can’t see or reach the back. Static bins just push everything deeper. A pull-out organizer brings everything forward so you actually use what you have instead of buying duplicates because you forgot you owned them.
What to look for: Metal construction (plastic warps if pipes leak), smooth-gliding drawers (cheap ones get stuck), height adjustability (so they work around your pipes), and mesh or perforated surfaces (so you can see what’s inside without opening drawers). Two-tier is standard; three-tier only works if you have significant vertical space.
Reality check: Most people buy these and then don’t use them because they didn’t measure first. The organizer gets stuck because pipes are in the way, or it doesn’t fit the cabinet depth. Measure before you buy. Also, these need to be removable so you can access pipes if there’s a leak.
The Kitstorack Under Sink Organizer with 2-tier pull-out design is an Amazon Choice product that solves the reach problem. It has smooth gliding and adjusts to fit different cabinet heights. Start with one or two depending on your cabinet width.
Which one? If your cabinet is wider than 24 inches, use two organizers side by side. If it’s narrower, one is usually enough. If you have a garbage disposal, measure the space it leaves and choose an organizer that fits that specific dimension.
Clear Stackable Drawers
Why this matters: If your cabinet is too shallow or oddly configured for pull-out organizers, stackable drawers give you vertical storage without taking up floor space. Clear drawers let you see what’s inside so you stop buying duplicates of cleaning products.
What to look for: Heavy-duty plastic (not flimsy), handles on the sides for easy removal, and stackable design that doesn’t require assembly. The drawers should be deep enough to hold standard bottles but not so deep that items get buried.
Reality check: These only work if you’re willing to remove them to access items in the back. If you need daily access to something, don’t bury it under three drawers. Also, clear plastic gets cloudy over time, but that’s fine; you can still see inside.
The Vtopmart Clear Stackable Storage Drawers are durable and let you see exactly what you have. They’re especially good for households with multiple people because everyone can see what’s where.
Which one? One to three drawers depending on your vertical space. Stack them only as high as you can comfortably reach without removing the entire stack.
Door-Mounted Hooks and Bins
Why this matters: Your cabinet door is wasted space. Adhesive hooks and small bins let you store hair ties, toothpaste, small bottles, and other frequently-used items where they’re visible and accessible. This keeps your main storage area cleaner.
What to look for: Heavy-duty adhesive (not the cheap kind that fails after a month), hooks that can handle weight, and bins that are shallow enough not to hit pipes when the door closes. Test the weight capacity; these need to hold more than you think.
Reality check: Only works on solid cabinet doors. Hollow-core doors will collapse if you load them with weight. Also, adhesive fails if the door is damp, so don’t store wet items here. Don’t overload these; they’re for frequently-accessed items only.
For door organization, adhesive hooks and small bins work well, but measure your door first to make sure bins won’t hit pipes when closed. Use one hook per item type so people know exactly where to return things.
Nice-to-Have Upgrades
Expandable Shelf Risers — If you have a cabinet with a fixed shelf taking up usable space, expandable risers create a second level. Worth it for deep cabinets where you’re losing vertical space. Skip if your cabinet is already shallow or if you have a garbage disposal.
Mesh Liners — Prevent small items from falling through gaps in pull-out organizers. Worth it if you store small bottles or products that tip easily. Skip if everything you store is larger items.
Labels — Handwritten labels on tape or printed labels help everyone in your household know where things go. Worth it for households with kids or multiple people using the space. Skip if you live alone and have a good memory.
Don’t Waste Money On These
Over-the-Door Organizers — They look good in photos but they hit your knees, they interfere with closing the cabinet door, and they take up floor space. Skip these completely.
Baskets Without Visibility — Opaque baskets hide contents. You’ll forget what’s inside, buy duplicates, and end up back where you started. Use only for non-cleaning items like paper products or trash bags where you don’t need to see inside.
Wire Shelving That Requires Installation — Most under-sink cabinets don’t have the right support structure for mounted shelving. You’ll end up damaging your cabinet or the shelves will be unstable. Avoid unless you’re comfortable with installation and your cabinet can handle it.
Organizers That Don’t Account for Pipes — Generic organizers without adjustable height or pipe cutouts will either not fit or require modification. Measure your pipes first. Don’t buy something and hope it works.
Decorative Storage — Your under-sink cabinet isn’t visible. Don’t pay extra for pretty finishes. Function matters; aesthetics don’t. Spend money on durability and usability, not looks.
The Under Sink Organization Process
1. Empty and Sort — Remove everything and sort into categories. This shows you what you actually have and what you can get rid of. Throw away expired products, dried-up bottles, and duplicates.
2. Measure Everything — Measure cabinet width, depth, height, and the space around pipes. Measure your organizers before buying. This step prevents the “it doesn’t fit” problem that derails most organization attempts.
3. Choose Your Organizers — Based on your cabinet type and measurements, select pull-out organizers, stackable drawers, or a combination. Don’t buy more than you need; start with one or two pieces.
4. Organize by Frequency of Use — Items you use daily go in the most accessible spot (top drawer, front position). Items you use weekly go in middle positions. Items you use monthly or less go in back or bottom positions.
5. Place Organizers in Cabinet — Install or place your chosen organizers. Make sure they slide smoothly and that nothing blocks pipes. Test that cabinet doors close without hitting anything.
6. Sort Items into Organizers — Place sorted items into their designated spots. Keep like items together. Don’t mix cleaning supplies with first aid items; separate categories stay organized longer.
7. Label Everything — Use tape and a marker or print labels. Label each drawer or section so everyone in your household knows where things belong. This is what keeps the system working after the first week.
8. Show Your Household — If you live with others, walk them through the system. Show them where things belong so they return items to the right place instead of just shoving things back randomly.
9. Do a Weekly Recheck — Every Sunday, spend two minutes checking that everything is in its designated spot. This takes 120 seconds and prevents chaos from building back up.
Keeping It Organized
The Sunday Recheck — Every Sunday evening, spend two minutes making sure everything is in its designated spot. This is faster than letting it get messy and reorganizing. Two minutes a week beats two hours every three months.
One-In-One-Out — When you buy a new cleaning product, throw out the old one. When you buy a new sponge, toss the worn-out one. This prevents accumulation and keeps your storage from overflowing.
Quarterly Purge — Every three months, pull everything out and check for expired products, duplicates, or items you never actually use. Toss them. This keeps your system from becoming a storage unit for things you don’t need.
Keep It Accessible — The moment your system becomes hard to use, it falls apart. If you have to move three things to access one item, you’ll stop using the system. Keep your most-used items in the easiest-to-reach spots. The system only works if it’s easier to put things back than to leave them out.
The habit matters more than the product. You can buy the fanciest organizers on the market, but if you don’t maintain the system, you’ll be back to chaos in a month. The best organizer is the one you’ll actually use.
What’s Next?
Under sink organized? Now tackle the next problem area. Kitchen organization extends beyond the sink—your drawers, your pantry, and your cabinets all need systems too. Or if bathrooms are your focus, bathroom storage solutions are the next logical step. Create one working system at a time. When this becomes automatic, move on to the next area.
Hey Homie,
Under sink organization isn’t about Pinterest perfection. It’s about finding what you need without digging through chaos, not buying duplicate products you forgot you owned, and creating a system that actually works for your household. Start with the basics—measure your space, choose one or two organizers that fit your cabinet layout, and label everything. Skip the fancy products that don’t solve real problems. The goal is a system so simple that everyone in your home knows where things belong and actually puts them back. That’s it. Start there, see what works, add more only if you need it.