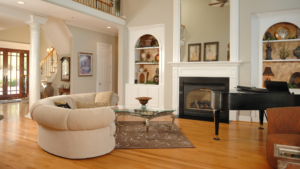
The living room shelf is sagging under mismatched frames from the thrift store, that lamp you thought was a steal has a wobbly base that’s already chipped, and the side table with the “vintage” charm is actually just covered in mystery stains that no amount of scrubbing hides. The coffee table tray holds a jumble of candles that don’t match and a vase that’s too tall and tips over every time someone walks by. It’s not ugly—it’s just off, like everything was grabbed in a rush without thinking how it all fits together.
You’ve been there: spotted something cute at the Goodwill for $5, brought it home excited, tried to style it on your mantel or entry table, maybe even watched a few YouTube videos on “thrift flips.” It looked okay for a day or two, then the enthusiasm faded, dust collected, and now it’s cluttering up the same space it came to organize. The frames don’t hang straight, the lamp’s cord dangles awkwardly, and that mirror you haggled for blocks the light instead of reflecting it.
The issue isn’t the thrift store prices or your taste—it’s that raw thrift finds need specific upgrades to work in a real home. Without the right tweaks, they stay awkward oddities instead of pulling your room together. Cheap wood scratches, fabrics fade fast, and proportions are all wrong for modern spaces. You’ve been buying potential without the tools to unlock it.
This isn’t a list of random flips. It’s how to audit your thrift haul first, match upgrades to your actual room, and build a system that keeps budget decorating looking fresh month after month.
Before You Buy Anything: The Thrift Haul Audit
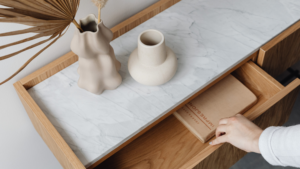
Grab that lamp or frame you just brought home and actually look at it under good light—phone flashlight works. Measure the key spots: height of the base, width of the shade or frame edge, depth if it’s a tray or box. Jot down the material too: is the wood solid or particle board that warps? Fabric sturdy or thin polyester?
Now check your space. Stand back and note the wall color, floor tone, light levels (north-facing dim or south bright?), and scale—tiny apartment shelf or big open living room ledge? Mismatched scales are why thrift stuff looks lost: a giant thrifted mirror overwhelms a small entry, while a mini vase disappears on a wide mantel.
Here’s what to scan for:
– Dominant room colors: Warm wood floors need warm-toned upgrades, cool grays pair with metallics.
– Traffic flow: High-traffic spots need durable finishes; low-use corners can handle delicate glass.
– Existing pieces: Does your thrift find echo the sofa fabric or rug pattern?
– Problem zones: Dingy brass? Wobbly legs? Faded upholstery?
These aren’t random checks—they reveal if your find needs paint, hardware, or a total redo. The golden rule: Upgrade for function first, style second. A stable lamp base matters more than perfect color-matching because wobbles annoy daily, while off-tones grow on you.
The 4 Thrift Find Types: Which Is Yours?
Wood Furniture Type Wobbly legs or scratched surfaces make it unsafe or ugly in high-use spots. Stabilizers and sandable finishes turn it polished; paint only after sealing. Skip flimsy particle board—it won’t hold up.
Metal Accents Type Tarnished brass or rusty iron clashes with clean rooms. Polishing kits and spray paint give custom finishes; add felt pads underneath. Skip anything pitted deeply; it rusts again fast.
Textile Finds Type Faded pillows or curtains look dated immediately. Fabric sprays and inserts refresh them; measure twice for perfect fit. Skip heavy wool in humid spots—it mildews.
Framing & Mirrors Type Odd sizes and cheap glass distort or overwhelm. New mats and hanging hardware scale them right; UV-protectant sprays prevent yellowing. Skip warped frames—they never straighten.
Start Here: The 5 Essentials
Surface Prep Cleaners
Why this matters: Thrift grime—sticky residues, built-up polish, mystery odors—undermines every upgrade. Without deep cleaning, paint peels, glue fails, and your “vintage” piece smells like the store forever. It’s the base layer that makes everything stick.
What to look for:
– Non-toxic for indoor use (no harsh fumes in living spaces)
– Cuts grease and oxidation (test on brass, wood)
– No residue left behind (rinses clean)
– Multi-surface (wood, metal, glass)
Reality check: All-purpose sprays dilute too much for thrift buildup—use a degreaser strength or regret repainting twice.
This is where I start every flip: a good scrub reveals the bone structure. If you’re new to this, grab something simple that handles wood and metal without stripping finish.
Which one? For small hauls, the basic works; bigger furniture needs the heavy-duty.
Hardware Stabilizers
Why this matters: Nothing kills budget decor faster than wobbles—lamps tip, shelves sag, tables shift under drinks. Sturdy hardware turns shaky thrift junk into reliable pieces that feel custom-built.
What to look for:
– Self-leveling feet (auto-adjusts to floors)
– Heavy-duty adhesive (no drilling)
– Rubber grips for silence and no scratches
– Size variety (1/2-inch to 2-inch)
Reality check: Furniture glides slip off; bumpers dent—get coasters with grip or live with noise.
These saved my entry console from constant nudges. Apply to all four legs, press 24 hours—no more shifting.
Paint & Finish Sprays
Why this matters: Raw thrift colors clash; faded finishes age a room 20 years. The right spray unifies and protects, making $10 finds match $100 store pieces.
What to look for:
– Matte or satin (hides imperfections)
– Primer-built-in for raw wood
– Quick-dry (under 30 min)
– Weather-resistant for near-windows
Reality check: Gloss shows every scratch; cheap cans sputter—buy mid-range for even coverage.
Krylon is my go-to for matte black on frames; it dries fast and doesn’t drip on verticals.
Pick matte for modern, brass for vintage—test on scrap first.
Fabric Refreshers
Why this matters: Thrift textiles harbor smells and stains that surface later. Protectants block future dirt while dyes even out fades, keeping pillows and curtains looking new.
What to look for:
– Odor-eliminators (baking soda base)
– Stain-repellent (water/oil proof)
– Fabric-safe (no bleaching)
– Spray or wipe-on
Reality check: Scented ones mask, don’t eliminate—neutral is best for layering.
This spray revived my thrifted curtains; no more thrift funk after a week.
For heavy use, pair with inserts; light duty solo.
Hanging & Display Kits
Why this matters: Poor hanging turns mirrors and art into hazards or eyesores—off-center, crooked, crashing down. Kits ensure level, secure installs that last.
What to look for:
– Picture wire + hooks combo
– No-stud anchors (drywall safe)
– Level tool included
– Weight-rated up to 50lbs
Reality check: Plastic anchors crumble; nails loosen—use toggle bolts for heavy.
The Command strips for frames changed my walls—no holes, repositionable.
Nice-to-Have Upgrades
Thrift Store Hacks book: Worth it if you’re flipping weekly—packed with sourcing tips and profit calcs for turning decor into side cash. Skip if casual; focus on home use only.
Thrift Store Flipping guide: Grab for detailed resell strategies if scaling up. Skip for pure decorating—too business-focused.
LED strip lights: Worth it for thrifted hutches or cabinets to highlight displays. Skip in bright rooms; washes out.
Velvet inserts for trays: Elevates serving pieces. Skip glass—shows smudges.
Don’t Waste Money On These
Trendy chalk paint — Chips on high-touch surfaces; needs constant waxing.
Cheap gold leaf kits — Rubs off in weeks; looks tacky fast.
Decorative knobs only — Pretty but useless; functional pulls outperform.
Mass-produced “vintage” signs — Fades and warps; true thrift has character.
Flimsy spray adhesives — Loses grip on uneven thrift wood.
Overpriced stencil sets — Misaligns on textured surfaces; freehand better.
The Thrift Upgrade Process
1. Sort the haul — Dump everything on a drop cloth outside or garage. Toss true junk (broken glass, moldy fabric)—this cuts 30% immediately and clears mental space.
2. Deep clean first — Degrease every surface. Why? Upgrades fail on dirty bases; clean reveals true color needs.
3. Audit and measure — Match to rooms now. Wide table? Needs chunky legs. Tall vase? Shortens with insert. Prevents buyer’s remorse.
4. Stabilize structure — Feet, glides, brackets before paint. Shaky pieces ruin finishes; solid base lasts.
5. Prime and paint — Thin coats, dry fully between. Builds durable layers without drips.
6. Add function — Inserts, liners, hardware. Pretty alone flops; utility makes it stay.
7. Style in place — Hang or place, step back 10 feet. Adjust levels, balance weights.
8. Test run — Use hard for a week. Wobbles show now, not at guests.
9. Seal everything — Protectant sprays last. Locks in look against dust, pets, kids.
Keeping It Maintained
“Monthly Dust Patrol”: Wipe upgrades with microfiber—no sprays that build up. Hits shelves, frames weekly; prevents grime return.
“One-In-One-Out”: New thrift find? Ditch an old. Caps clutter growth.
“Seasonal Refresh”: Swap textiles quarterly. Keeps budget pieces feeling new.
“FIFO Rotation”: Front-load oldest decor. Nothing fades hidden.
Products fade without habits—dust a matte lamp monthly or it dulls fast. The system outlives the spray can.
What’s Next?
Decor upgraded? Hit living room organization ideas or more budget decor finds. Pick one zone, repeat the process. Build momentum without overwhelm.
Hey Homie,
Budget decorating with thrift finds isn’t chasing trends or perfection—it’s spotting potential, fixing real flaws, and making pieces work for your light, your traffic, your life. Amazon upgrades bridge the gap from awkward to intentional without big spends. You’ve got the audit, the process—pick one find this weekend, upgrade it using steps 1-5, see it transform. That’s how spaces stick.